


Docu-WEB portal. General description
- Table of contents
- Docu-WEB portal. General description
- 01 Introduction
- 02 How to start
- 03 Daily use of the portal
- 04 Deleting a document
- Contacts of Docura customer support
- Read more
01 Introduction
The DOCU-WEB portal allows you to manage e-documents: create, send and receive, view, search, filter, resend, receive e-mail notifications about e-document operations, manage the master data of partners and of your own company (addresses, partners, products, prices). E-documents are stored in the portal for 90 days. The portal is located at https://app.docura.net
The elements of the portal home page are the following:
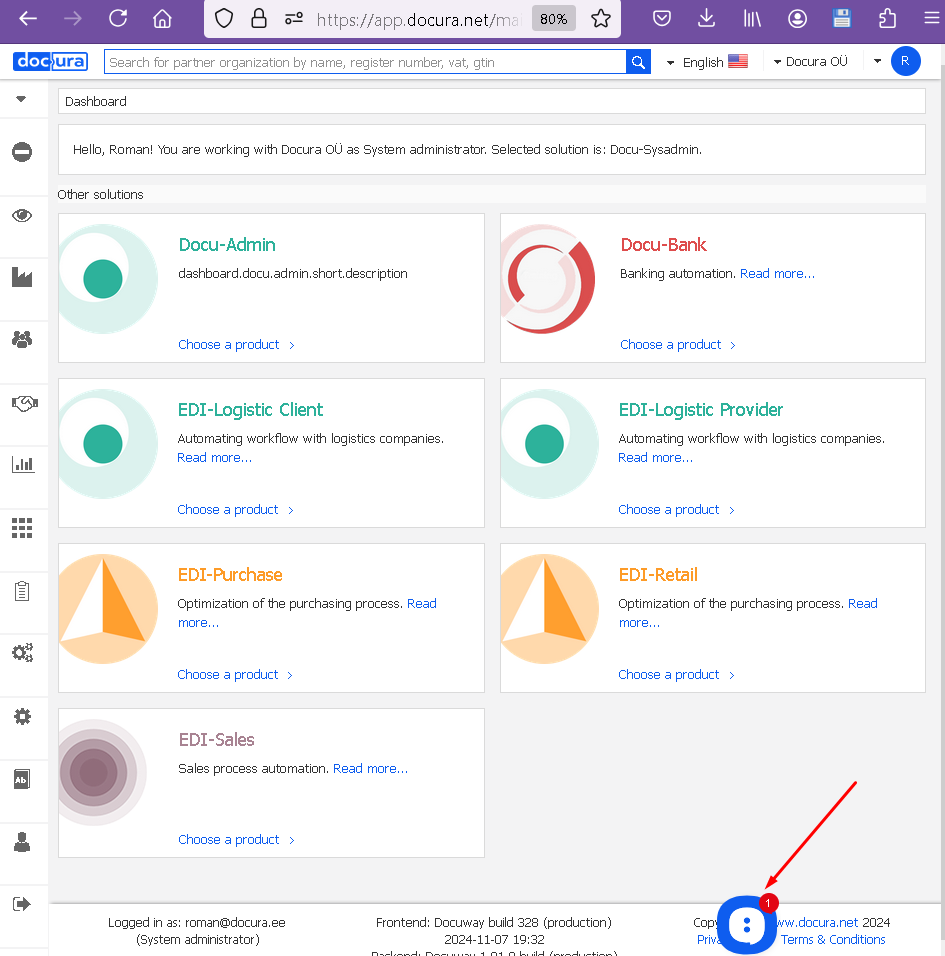
- Menu selection button (1) lets you choose the menu according to the EDI service you use
- Main menu (2) is located on the left-hand side with different forms.
- Additional menu (3) operations with e-documents.
- Search (4) lets you search by organisation name or code.
- Filter (5) lets you filter documents by number, creation date, partner name and other parameters.
- Table with the list of e-documents (6) lets you view the list of documents together with the document data, add a new document, generate a report, generate the document file in different formats, show/hide the table columns.
- Chat support (7) lets you ask customer support for help online.
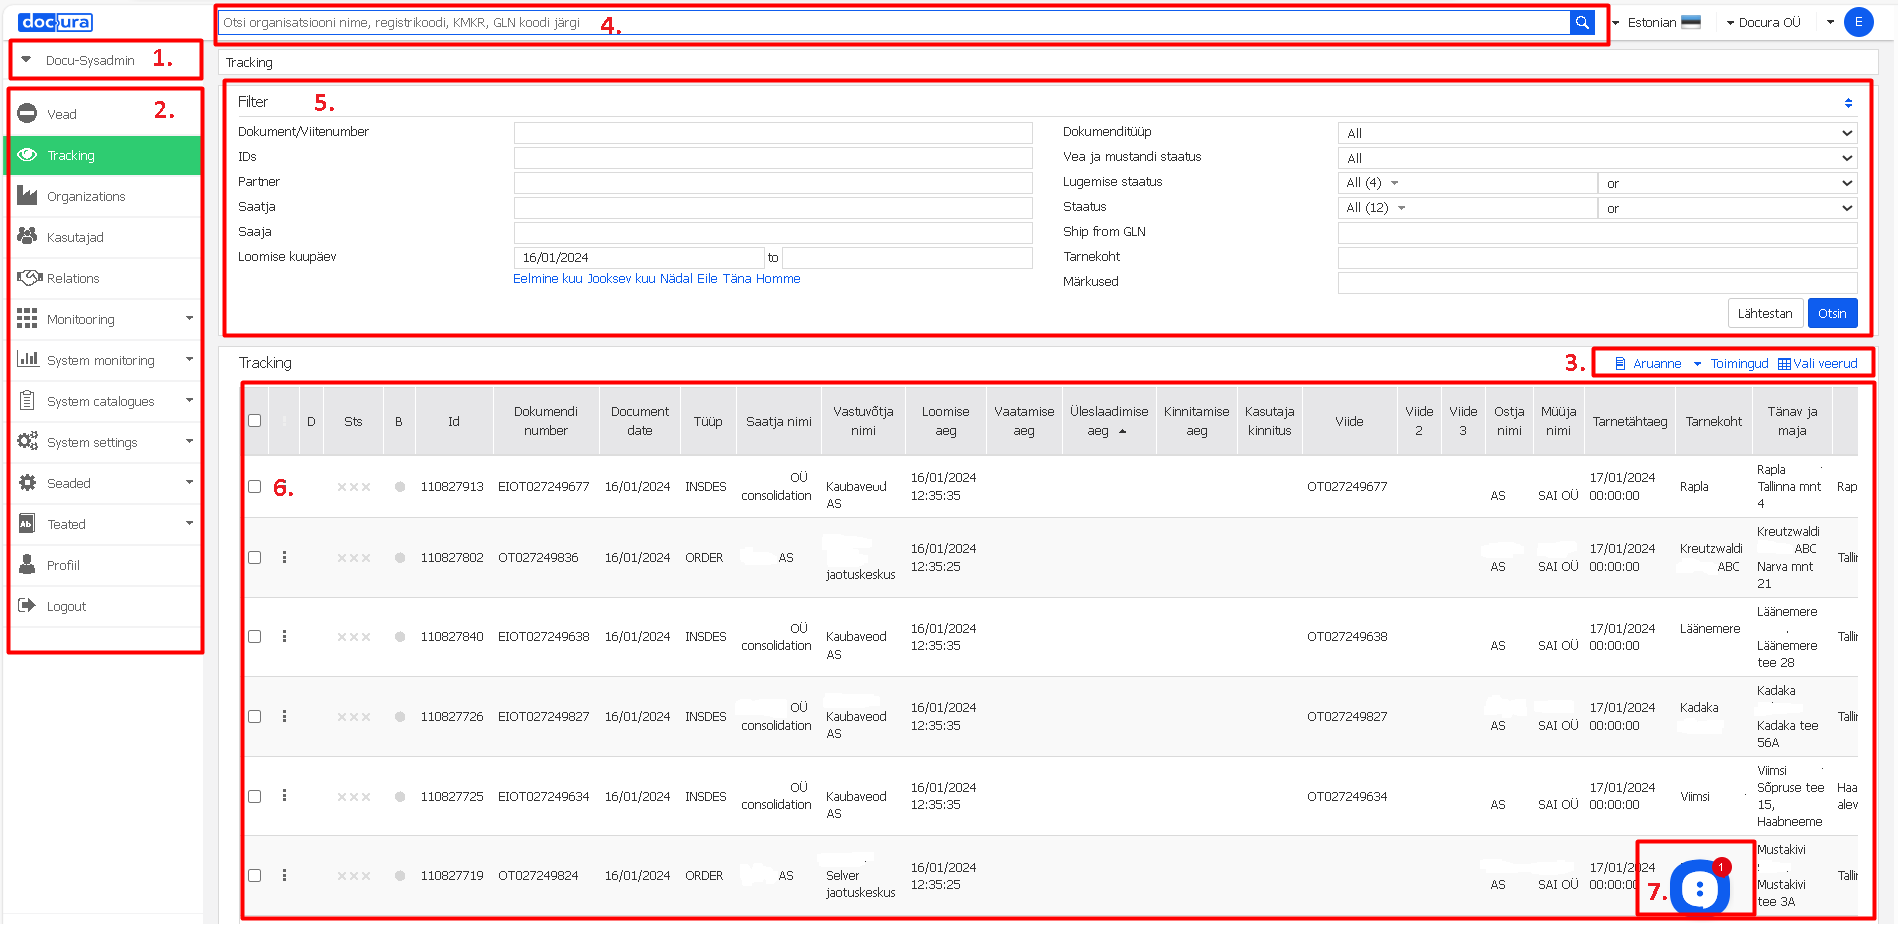
Screen 1. Components of the DOCU-WEB portal home page.
02 How to start
Registration in the portal, then the initial setup: your own organisation's data and the data of partners.
01 Registration in the portal
- Go to https://app.docura.net (live) and sign up. The password must be at least 8 characters and must contain uppercase letters, digits and special symbols (e.g.
!or.).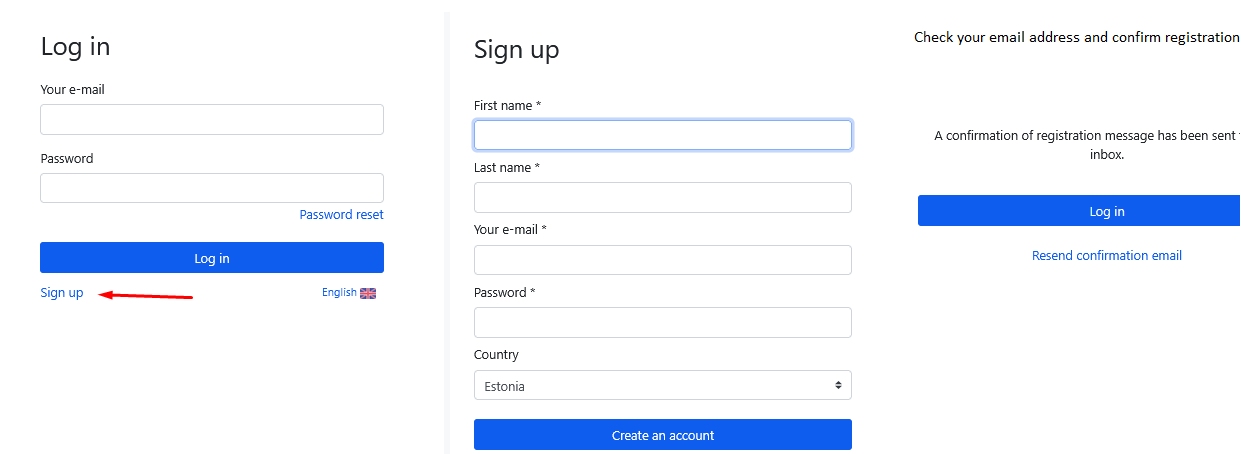
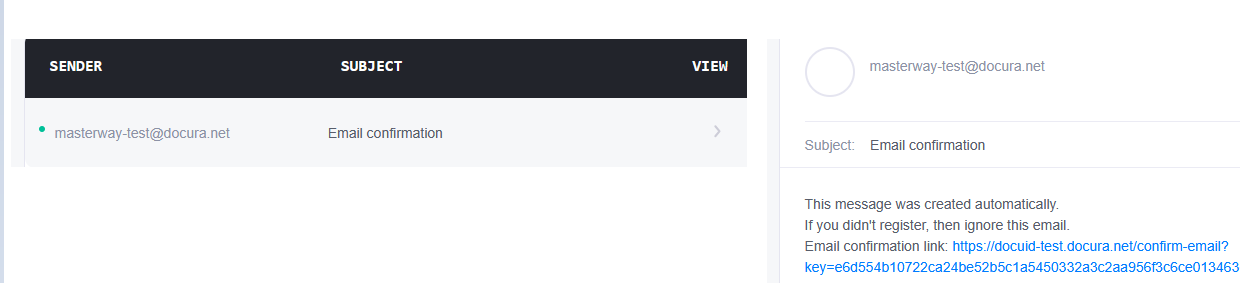
- Check your e-mail address and confirm the registration by the link in the letter.
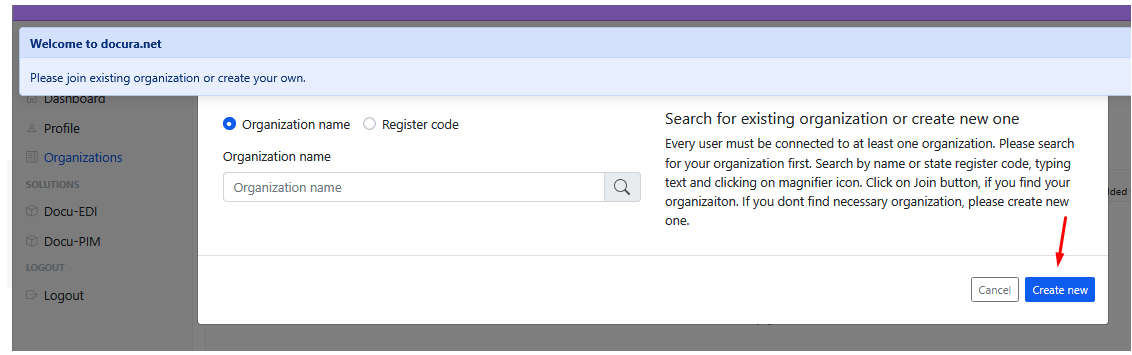
- Find or register your organisation. If you have no organisation, register as a natural person.


- In Profile you find your ClientID (your e-mail address) and your Client secret (API key). These are the credentials for API integrations; they are not needed for working in the portal itself.
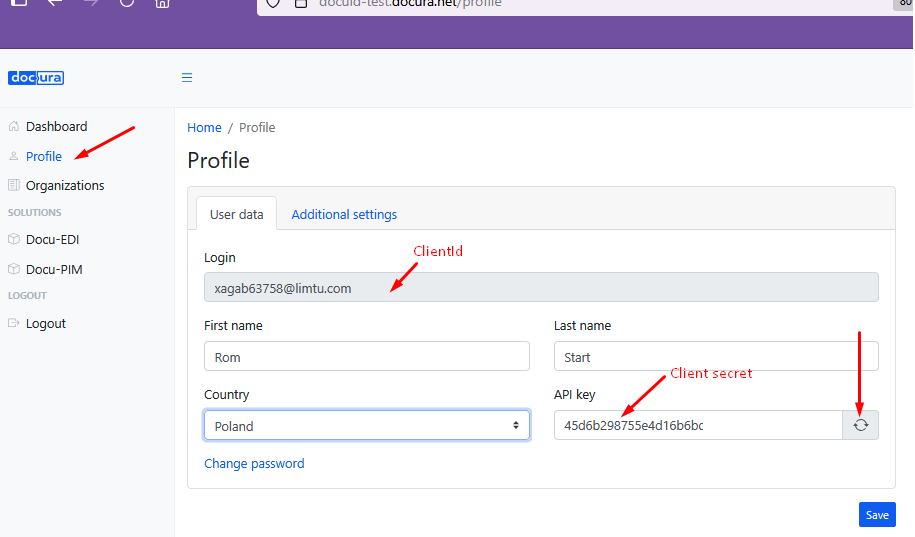
- For the test environment use https://app-test.docura.net (test). Access to the test environment is usually agreed with the Docura project manager separately.
Registration is needed only once. Later you sign in with the e-mail address and password you have set.
02 Setting up your own organisation's data
Under the "Settings" menu button there are the following sections:
- Users – you can add users to your organisation, delete them and change passwords. Adding a user: from the menu "Settings" → "Users" click "+ Add new" on the right. An empty user card opens. Fill in the e-mail address field and press → "Next". Enter the "Name" and the "Surname". The password is generated automatically. You can change the password. Save the data.
- Organization – lets you manage your organisation's data.
- My addresses – lets you enter your own addresses (e.g. legal address, stores and warehouses) and location codes.
To start working you have to enter at least your own legal address: "Settings" → "My addresses".
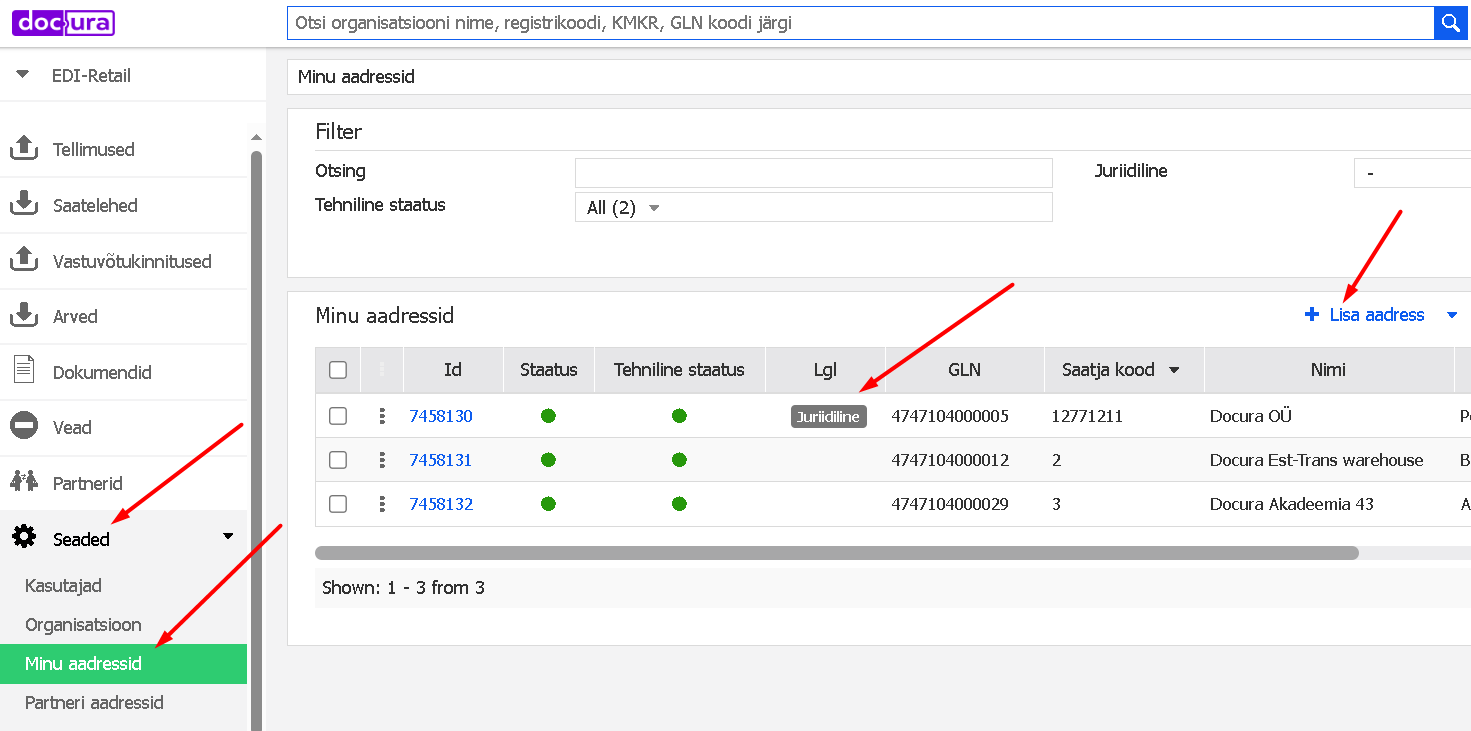
Screen 2. View of the organisation's own addresses
Click "+ Add address" in the menu. An empty address card opens. With "Search" you look for the address (1), you can also click on the map (2). You can search for a delivery location, e.g. a store name. Enter your own location code, which you have defined yourself in your ERP (3). Enter the address, i.e. the name of the place (4), e.g. the Est-Trans warehouse. "Notes" – here you can add comments and useful information, e.g. for the driver when delivering the goods (if needed) (5). Save by pressing the "Add" button.
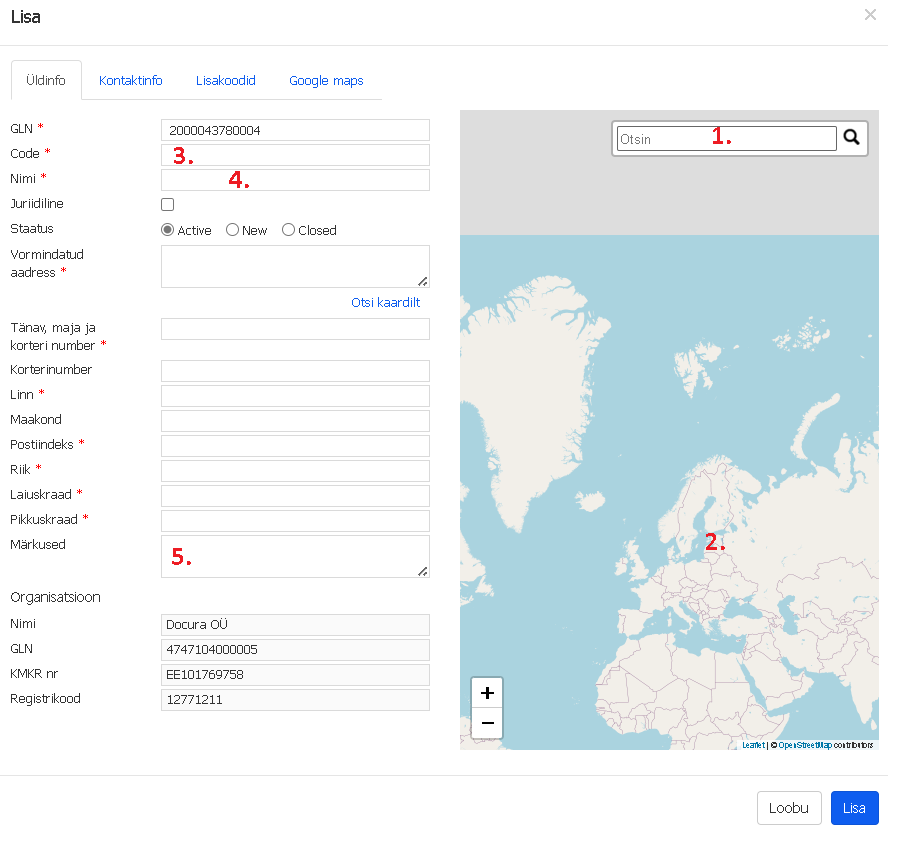
Screen 3. Adding a new address.
- Notifications – you can direct portal notifications to an e-mail address specified by you.
To set up sending notifications to an e-mail address, proceed as follows: select "Notifications" in the menu, add "Notification" → the notification setup window opens. Select the document parameters you want to be notified about by e-mail: document type and document status, document direction and between whom the document moves. Write the e-mail address to which you want the information to be sent. With the "Active/Deactivated" field you can activate or deactivate the notification. The remaining data fields do not need to be filled in. Save the form.
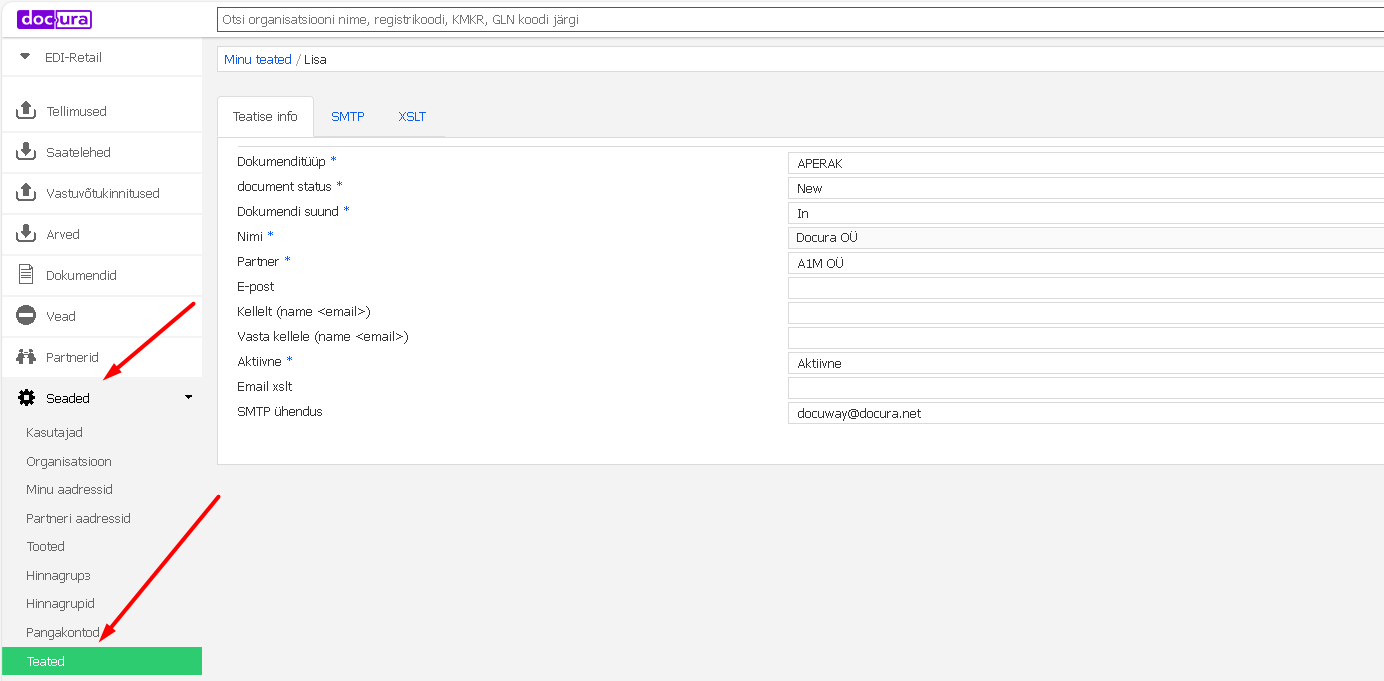
Screen 4. Setting up a new notification type.
03 Entering partner data
The EDI initiator enters their partners: "Partners" – "Add" partner → a list of partner legal entities appears. If the partner and their address already exist in Docura, the partner is selected and the partner (location) code defined in your own ERP is entered, or the GLN is used.
Partner addresses are entered under "Settings" – "Partner addresses" – "Add address"; every address gets its own code. The entered partners are listed under the menu "Partners".
What a partner code, a delivery location code and a GLN are, how they are linked to addresses in the Partner codes panel, and what happens when a code is missing — see 02 Partners, codes and GLNs.
04 Sending a binding enquiry to a partner
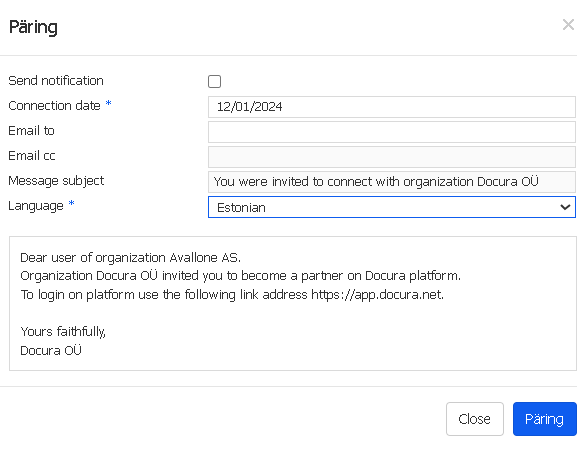
The table on the partners page lets you send a binding enquiry to a partner through the portal and monitor the binding statuses. When a new partner organisation is added, the status "Enquiry" is assigned in the partners table. Press "Enquiry" and the form for sending the enquiry opens. Enter the recipient's e-mail address. The text of the enquiry appears automatically. If you wish, you can edit the text.
03 Daily use of the portal
Make sure that the initial setup has been done, that your addresses and the partner addresses with codes have been entered.
To continue working in the portal, select the EDI service you use. For that the "Menu" selection button is located in the top left corner of the screen. For example, if you are a buyer select "EDI-Retail", if you are a seller to retail chains select "EDI-Sale".
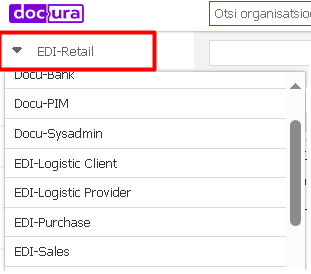
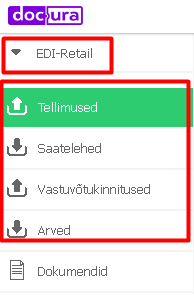
When "EDI-Retail" is selected in the menu, the following document types are displayed: purchase orders, purchase invoices (purchase delivery notes and receiving confirmations).
Under Orders you find your purchase orders. You can filter orders, add new orders, generate reports, print and generate xml files.
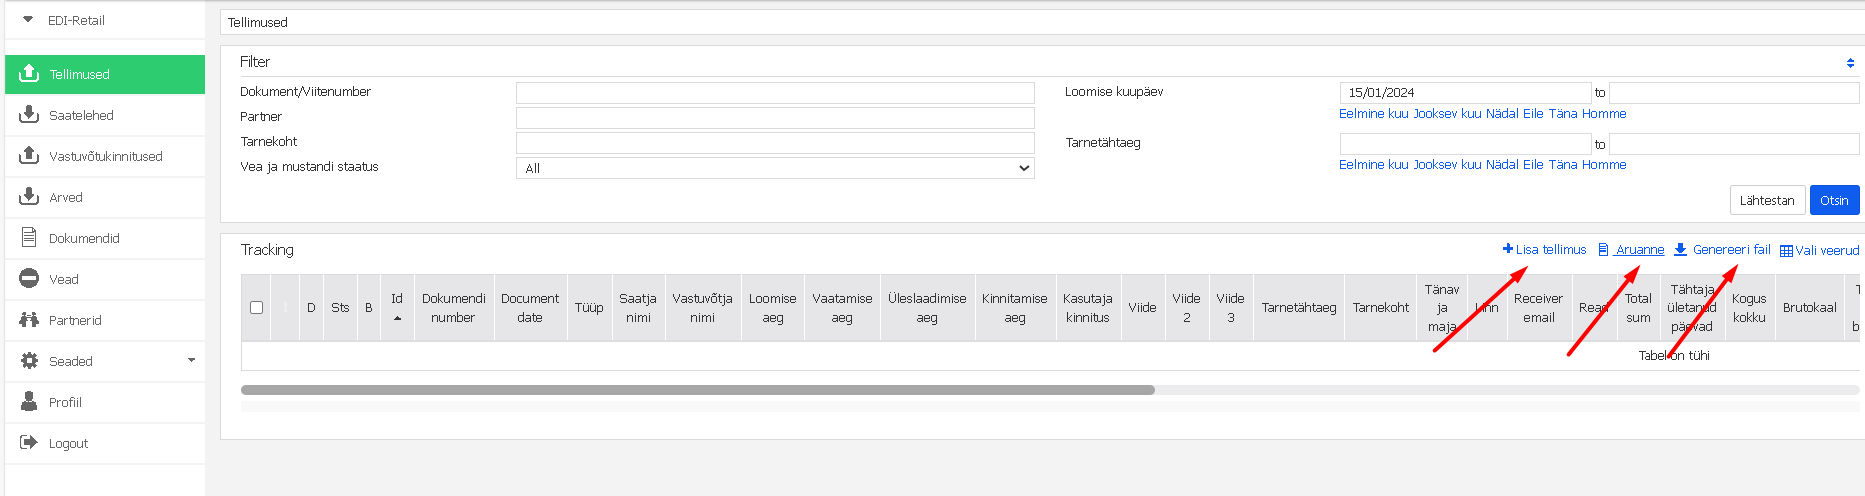
Screen 7. Operations with an e-document.
With the other document types in the menu ("Delivery notes", "Receiving confirmations" and "Invoices") similar operations can be performed (create, search, print, download files).
04 Deleting a document
A document can be deleted, but it is not physically erased: it is marked as deleted and disappears from the standard document list. If necessary, a deleted document can still be opened and viewed — enable the display of deleted documents in the filter.
To delete a document:
- Press the three dots on the row of the selected document.
- Select "Delete".
Done – the document has been marked as deleted on the Docura platform.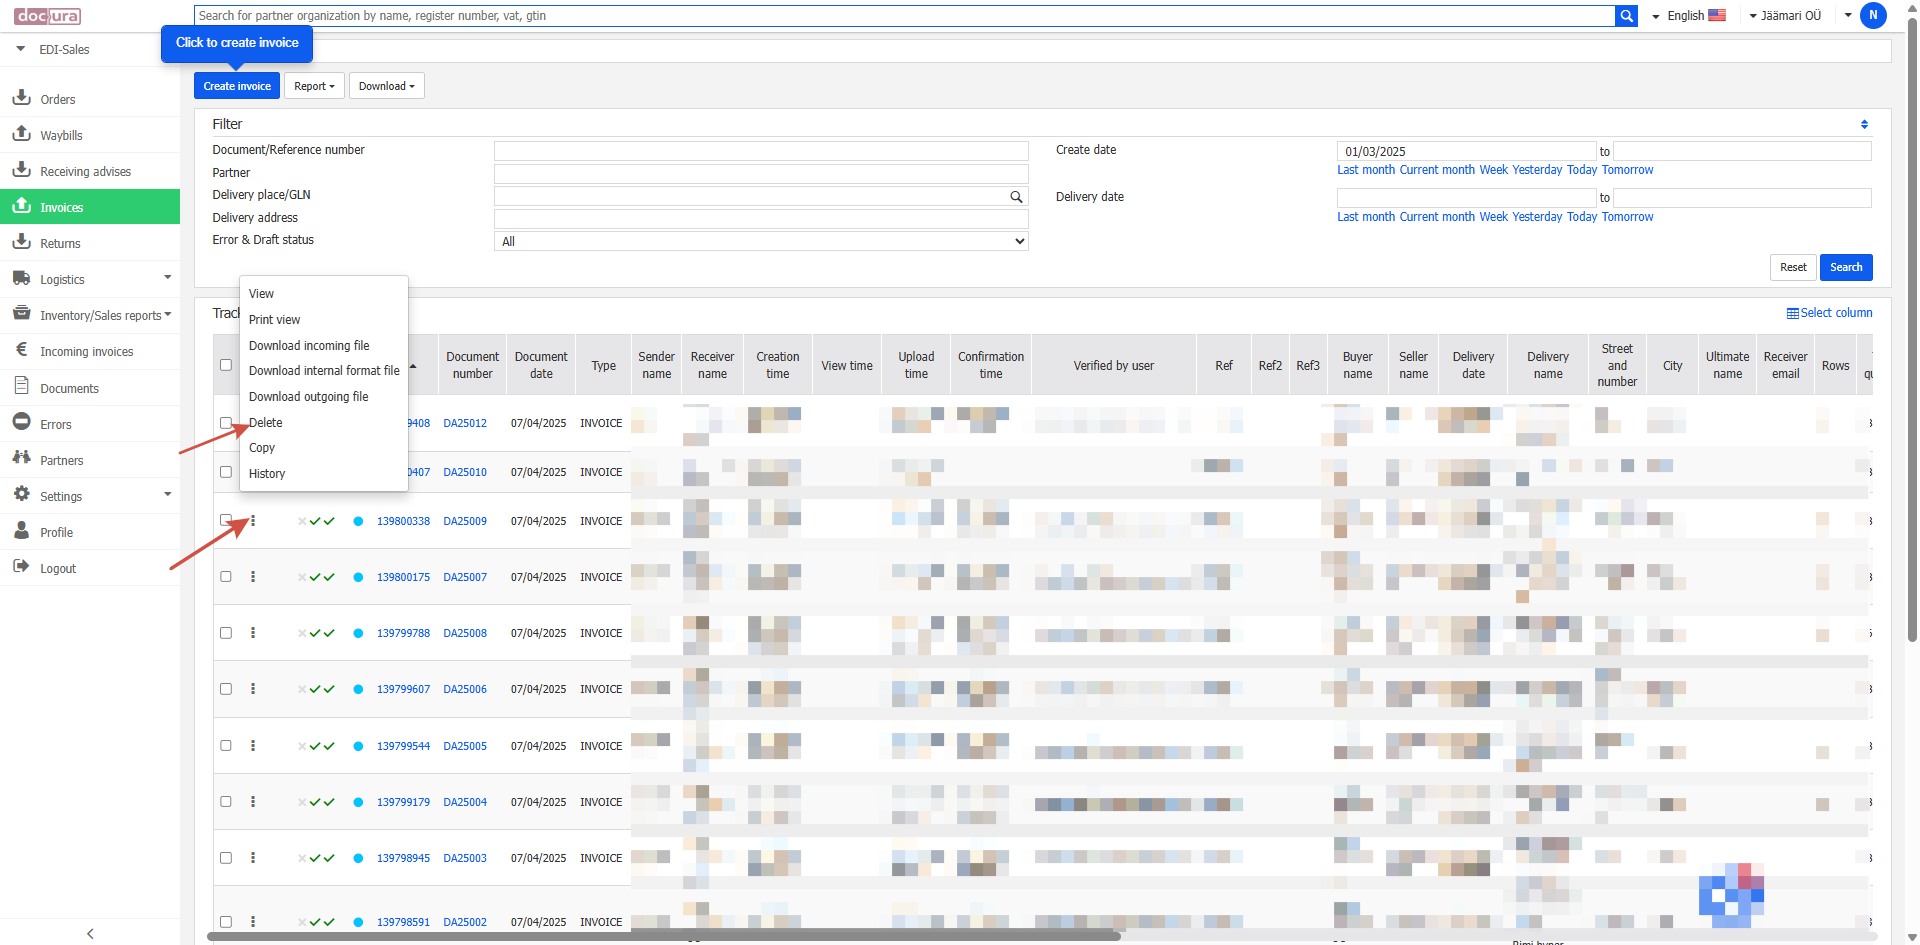
Contacts of Docura customer support
- Phone number: + 372 56 40 620
- Technical support: support@docura.net
- Customer support e-mail address: info@docura.ee
- Live chat
Read more
Children of this section:<br>