


CompuCash
- Table of contents
- CompuCash
- 01 CompuCash Overview
- 02 EDI Setup for Version 4.
- 03 EDI Setup - Version 5 (API)
01 CompuCash Overview
POS and ERP system CompuCash: https://www.ektaco.ee/product/compucash/
The CompuCash POS system and cash register from Ektaco AS has been adapted to the needs of various segments in cooperation with clients and has been in operation for 30 years. It is used in restaurants, shops, museums, and elsewhere.
- Version 4: older version
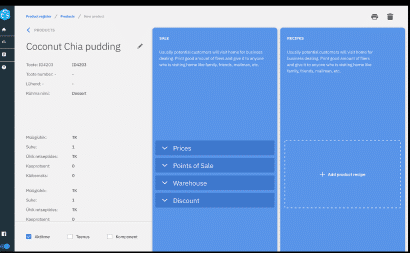
- Version 5: web-based system
02 EDI Setup for Version 4.
1 General settings
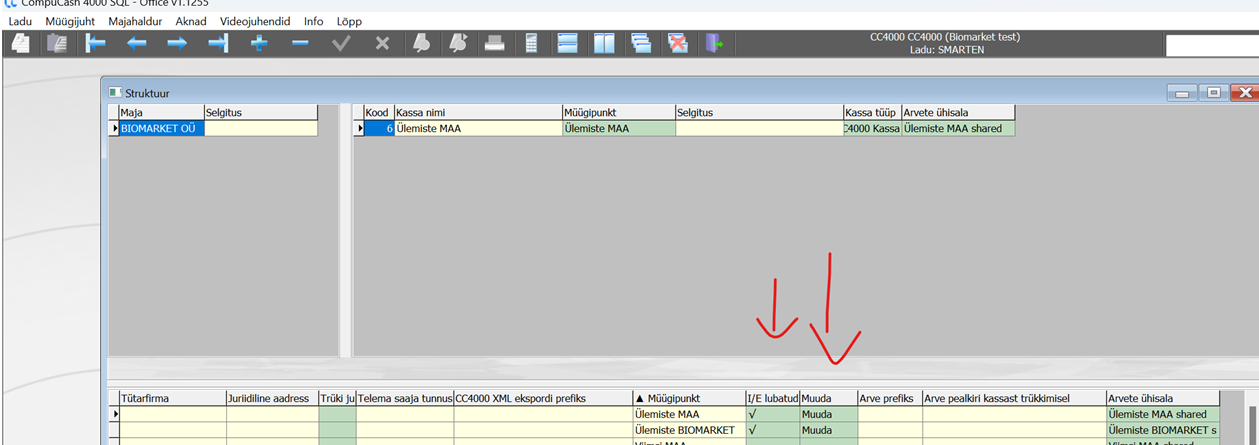
- Kontrollige seadistusi: Majahaldur → Struktuur → Luba i/e / Muuda. This must be changed by Ektaco (Compucash haldur) support. The location must be assigned a code and I/E enabled for FTP.
- This procedure is usually performed by Ektaco. To do this, contact Ektaco customer service and ask them to activate FTP data exchange. NB! The service is generally subject to a fee, costing 120 EUR + VAT
- Menu CompuCash - Majahaldur - Konfiguratsioon - Üldine
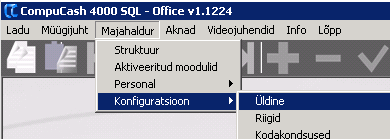
- CompuCash connection setup: Open CompuCash → Majahaldur → Konfiguratsioon → Üldine → Ühendused → 4Doc(EDI)
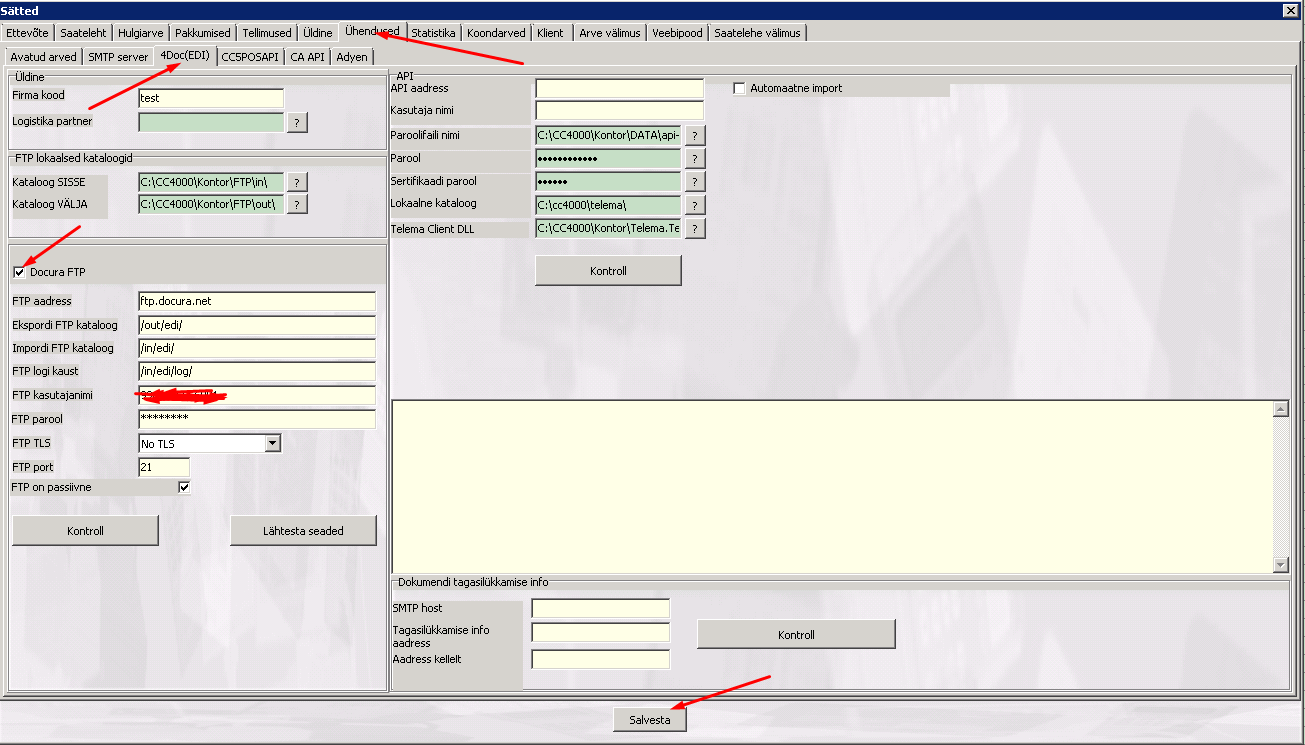
2 PURCHASES. Data exchange setup with suppliers
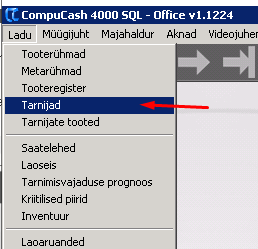
- Open Menüü → Ladu → Tarnijad.
- Check that the supplier has a tick in the "I/E lubatud" column. If not, double-click to add the tick.
- Double-click Muuda to open the supplier settings form (after a short delay the organization settings form will open).
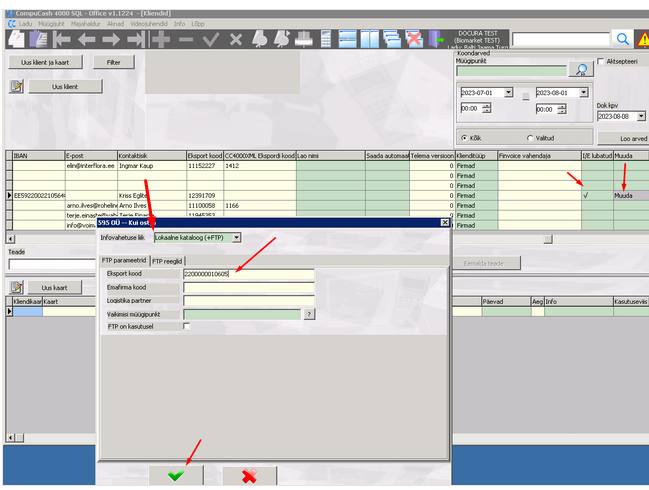
- Infovahetuse liik: Lokaalne kataloog (+FTP)
- Eksportkood: if the supplier has an export code, it must be linked to the partner in the Docura portal. If not, set the partner's GLN from the Docura portal.
- Salvesta.
Now you can send purchase orders and receive purchase invoices.
3 Sales: customer data exchange setup
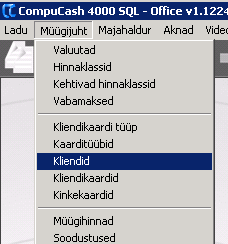
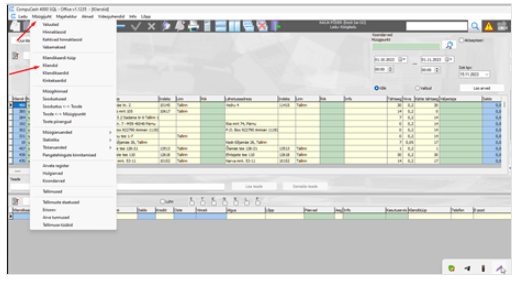
- Open Menüü → Müügijuht → Kliendid.
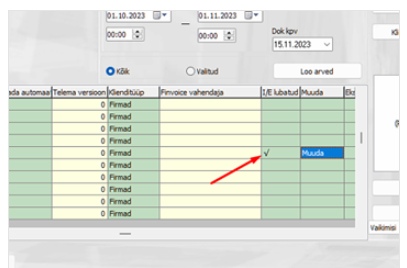
- Check that the customer has a tick in the "I/E lubatud" column. If not, double-click to add the tick.
- Double-click Muuda to open the customer settings form.
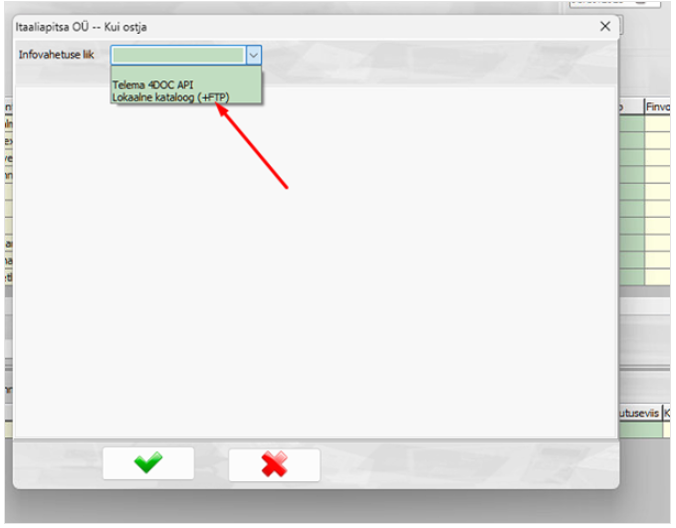
- Infovahetuse liik: Lokaalne kataloog (+FTP).
- Eksportkood: if it already exists, link it to the partner in the Docura portal. If not, enter the partner's GLN in the Docura portal.
- Salvesta.
Now you can receive sales orders and send sales invoices.
4 Sending e-invoices
Set up the CompuCash system to enable sending e-invoices to customers via the EDI channel.
Steps- Check the company's registration code and e-invoice acceptance: use the Business Register (Äriregister) address https://ariregister.rik.ee/ to find the company's registration code and check whether the company accepts e-invoices.
- Open Müügijuht - Kliendid:
- Check the I/E lubatud setting: make sure that I/E lubatud is activated for the customer. If not, activate it.
- Modifying customer data: click Muuda and make the necessary modifications according to the examples. Set the information exchange type to Lokaalne kataloog (+FTP).
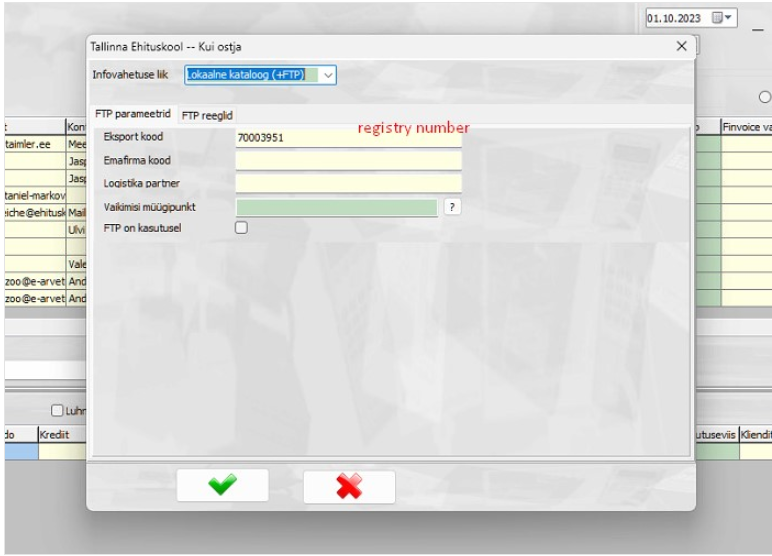
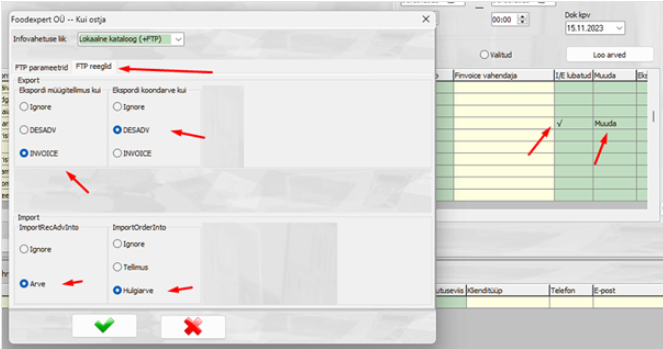
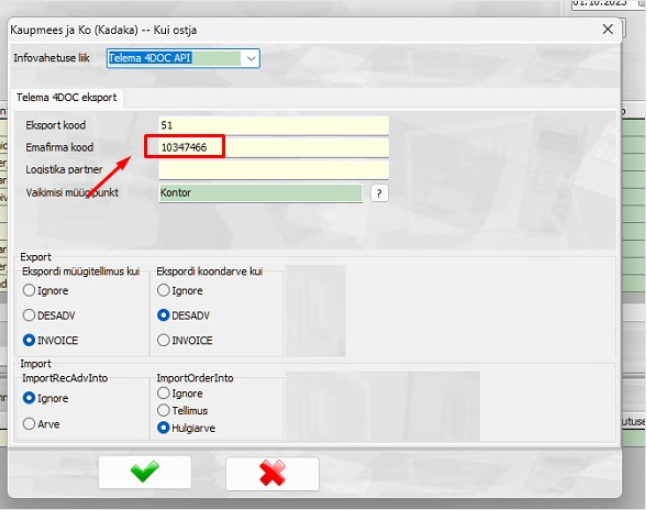
- Sending an invoice via the EDI channel: if an invoice needs to be sent via the EDI channel (e.g., to Rimi, Prisma and others), first check the Telema 4DOC API settings. Enter the parent company code and the export code. Set the information exchange type to Lokaalne kataloog (+FTP).
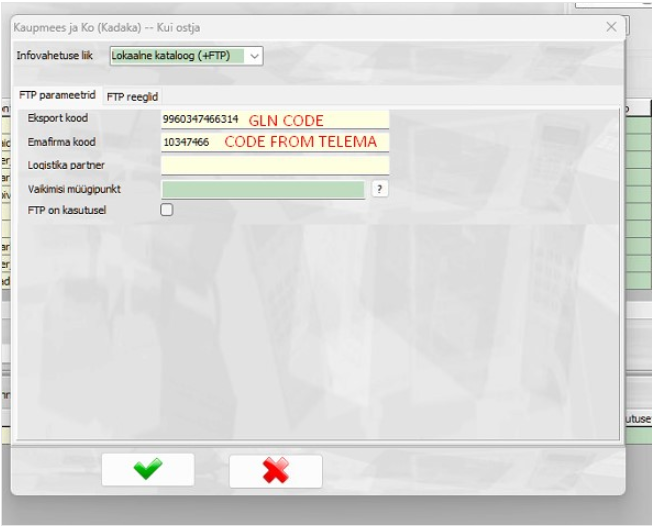
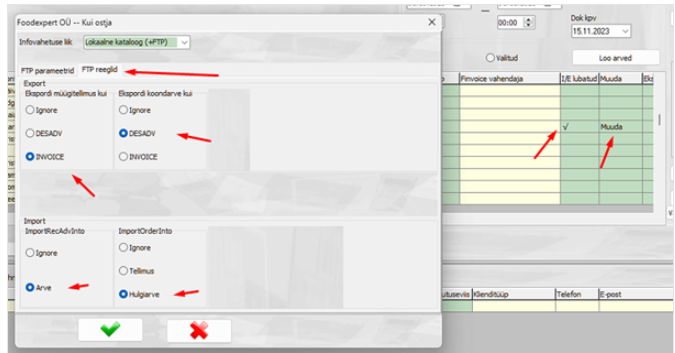
- FTP reeglid: make sure that the FTP rules match the Telema 4DOC API settings.
03 EDI Setup - Version 5 (API)
01 Documents
Version 5 integration is done via API and supports the following functions:
- Purchasing: sending purchase orders and receiving purchase invoices (including e-invoices).
- Sales: receiving sales orders, receiving sales invoices (wholesale invoices) and sending sales invoices (including e-invoices).
02 Setup:
- Send an email to kassa@ektaco.ee to activate the EDI partner via Docura.net.
"Alustasime koostööd Docura OÜ-ga ja soovime nendega avada EDI teenuse nende platvormi Docura.net kaudu.
Palume häälestada 'default kasutaja' API jaoks.
Palume häälestada määratud disablePrePayProduct " - Once Ektaco has activated the Docura interface, activate the API and send the "Client Name:" and "Secret:" data received from Ektaco to our support service at support@docura.net.
- Log in to app.docura.net.
- Select Settings → Integration and find CompuCash.
- Enter "Client name" and "Secret" and create the connection.
- The system is now ready for use.